
What will you learn?
Paper Quilling
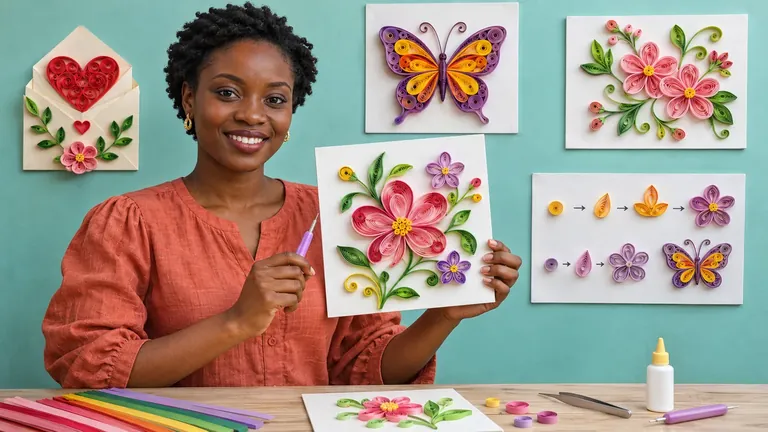
Get to know the tools and begin with a flower-board project. Practise rolling, shaping and arranging the paper elements.
Develop individual flowers and a butterfly across a sequence of demonstrations. Notice how small units combine into a larger design.
Continue with a decorative letter and a heart project. The lessons explain the tools and techniques so that you can repeat the shapes and adapt your own arrangements.
Learning outcomes
- Recognise paper-quilling tools and their uses
- Roll and shape paper elements
- Build decorative flower forms
- Create a butterfly composition
- Develop letter and heart projects
Your learning path
Course curriculum
Browse the complete lesson sequence. These are translated lesson titles and descriptions; current video recordings remain in Arabic.
01 · Tools and a flower-board project4 lessons
- Course introduction00:34
Practical demonstration: Course introduction. Watch the steps, pause to practise and review the result before continuing.
- Tools and a flower-board project — Part 120:26
Practical demonstration: Tools and a flower-board project — Part 1. Watch the steps, pause to practise and review the result before continuing.
- The flower board — Part 220:33
Practical demonstration: The flower board — Part 2. Watch the steps, pause to practise and review the result before continuing.
- The flower board — Part 310:42
Practical demonstration: The flower board — Part 3. Watch the steps, pause to practise and review the result before continuing.
02 · Forming a flower3 lessons
- A paper-quilled flower — Part 120:08
Practical demonstration: A paper-quilled flower — Part 1. Watch the steps, pause to practise and review the result before continuing.
- A paper-quilled flower — Part 221:54
Practical demonstration: A paper-quilled flower — Part 2. Watch the steps, pause to practise and review the result before continuing.
- A paper-quilled flower — Part 323:47
Practical demonstration: A paper-quilled flower — Part 3. Watch the steps, pause to practise and review the result before continuing.
03 · Butterfly project5 lessons
- A paper-quilled butterfly — Part 118:33
Practical demonstration: A paper-quilled butterfly — Part 1. Watch the steps, pause to practise and review the result before continuing.
- A paper-quilled butterfly — Part 219:29
Practical demonstration: A paper-quilled butterfly — Part 2. Watch the steps, pause to practise and review the result before continuing.
- A paper-quilled butterfly — Part 319:22
Practical demonstration: A paper-quilled butterfly — Part 3. Watch the steps, pause to practise and review the result before continuing.
- A paper-quilled butterfly — Part 419:02
Practical demonstration: A paper-quilled butterfly — Part 4. Watch the steps, pause to practise and review the result before continuing.
- A paper-quilled butterfly — Part 522:21
Practical demonstration: A paper-quilled butterfly — Part 5. Watch the steps, pause to practise and review the result before continuing.
04 · Decorative-letter project7 lessons
- A paper-quilled letter — Part 122:33
Practical demonstration: A paper-quilled letter — Part 1. Watch the steps, pause to practise and review the result before continuing.
- A paper-quilled letter — Part 221:37
Practical demonstration: A paper-quilled letter — Part 2. Watch the steps, pause to practise and review the result before continuing.
- A paper-quilled letter — Part 322:26
Practical demonstration: A paper-quilled letter — Part 3. Watch the steps, pause to practise and review the result before continuing.
- A paper-quilled letter — Part 422:37
Practical demonstration: A paper-quilled letter — Part 4. Watch the steps, pause to practise and review the result before continuing.
- A paper-quilled letter — Part 520:21
Practical demonstration: A paper-quilled letter — Part 5. Watch the steps, pause to practise and review the result before continuing.
- A paper-quilled letter — Part 614:00
Practical demonstration: A paper-quilled letter — Part 6. Watch the steps, pause to practise and review the result before continuing.
- A paper-quilled letter — Part 717:47
Practical demonstration: A paper-quilled letter — Part 7. Watch the steps, pause to practise and review the result before continuing.
05 · Heart project3 lessons
- A paper-quilled heart — Part 120:04
Practical demonstration: A paper-quilled heart — Part 1. Watch the steps, pause to practise and review the result before continuing.
- A paper-quilled heart — Part 220:30
Practical demonstration: A paper-quilled heart — Part 2. Watch the steps, pause to practise and review the result before continuing.
- A paper-quilled heart — Part 321:16
Practical demonstration: A paper-quilled heart — Part 3. Watch the steps, pause to practise and review the result before continuing.
Tools and materials
- Paper-quilling strips and tools described in the course
- Suitable paper or card backing
- Appropriate adhesive
Materials, software and devices are purchased separately. Check compatibility and follow the safety instructions for the products you use.
Make time for practice
Watch a manageable part of the demonstration, pause and try the steps yourself. Keep your exercises so that you can compare them. Return to difficult sections and develop your work at your own pace.
Who is this course for?
Beginners interested in decorative paper craft and small handmade projects.
Record your progress
Your account saves lesson completion and playback position. Once eligible, request a completion certificate with the name you want printed on it. Newer members need to complete 60% of the lessons; eligible previous members can request directly. The certificate is emailed once per course and is not an academic or government qualification.
Read certificate and learning terms ↗Questions about this course
What language are the recordings in?
Current recordings are in Arabic. The website and lesson outline are available in English; changing the website language does not change the video audio.
Will I need to buy the same course in the other language?
No. Both website languages use the same course and enrolment. Your valid access opens the same course without another purchase. English recordings are playable only after they are supplied and verified.
How do I access my lessons?
Sign in with the account used for purchase. After payment confirmation, open My Courses and choose this course. Lessons are streamed in your account and can be paused and replayed.
How do I receive a certificate?
Request it from your learning space once eligible. Members registered after 10 October 2026 need 60% lesson completion. Eligible previous members can request directly. The certificate is emailed as an image and is not an academic qualification.
Are materials or software included?
The course price covers the recorded educational content. Required art materials, software and devices are separate. Review the tools list before enrolling.

