What you will learn
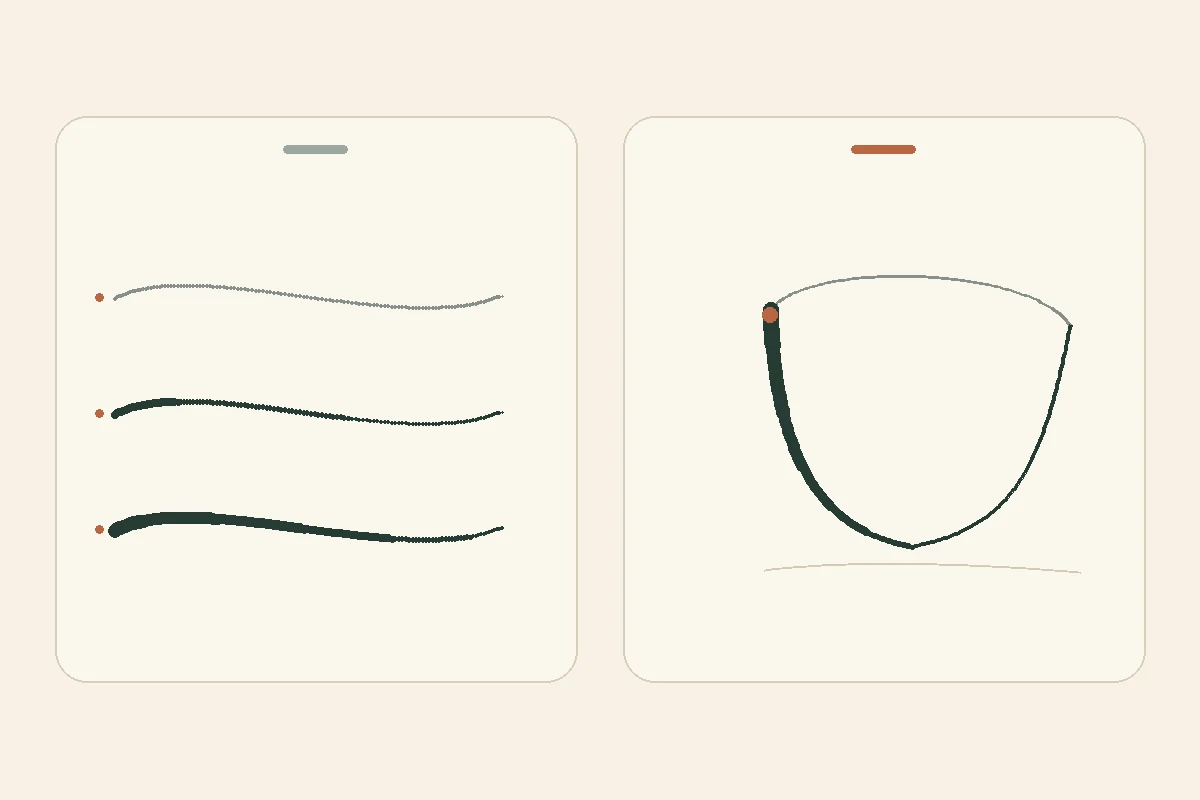
- Make a sample strip with three distinct marks.
- Strengthen short sections where objects overlap or make contact.
- Compare both studies at arm’s length.
What is line weight?
The National Gallery of Art’s everyday objects lesson uses contour to describe a shape and changes in pressure to vary mark quality. This exercise brings those observations together in one small composition. National Gallery of Art · Drawing Everyday Objects
With a pen, width is usually the clearest difference. With graphite, pressure can darken the mark before it becomes noticeably wider. Choose three marks you can repeat comfortably. The labels light, medium and strong describe their relative effect within this drawing.
Set up the objects and test three marks
The National Gallery’s introduction to drawing uses contour to reduce an object to its boundaries and main forms. A plain cup and a closed book keep the main boundaries easy to observe. National Gallery of Art · Explore the Basics of Drawing
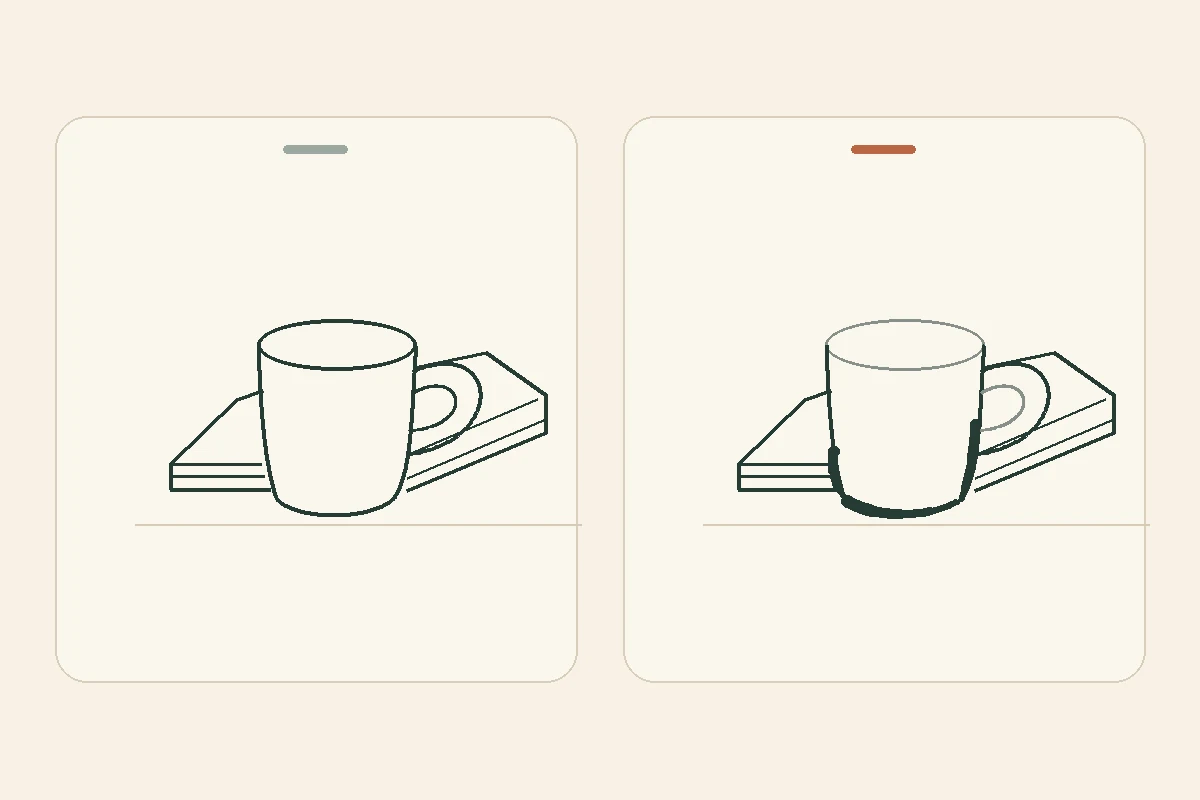
Set the cup in front of one corner of the book so it hides a small portion. Keep the same viewpoint throughout. Divide your page into two rectangles and use a pencil and scrap paper, two pen nibs, or one digital brush with a few chosen sizes.
Make three short samples. Keep the light mark visible and practise easing off at the end of the strong mark. When you see how the taper behaves on scrap, it becomes easier to place on the drawing.
Draw the first version with even outlines
Sketch the ellipse of the rim, the sides, the bottom and the handle. Draw the book at the angle you see. Stop its edge where the cup hides it and resume only where it reappears. Keep the cup’s top and base in the same positions in both drawings.
Clean up your first version with one medium weight. Leave lettering, patterns and broad shadow out of this comparison. Keep the drawing in view or duplicate the preliminary sketch if you are working digitally.
Give the second version a hierarchy
Keep most of the second outline medium. Strengthen a short section around the book’s overlap with the cup and another at the point where the cup meets the table. Test a lighter stroke along the rim or the inside of the handle.
Taper the strengthened marks into their neighbours. Short accents give you a clearer comparison than tracing the whole outline. If an accent makes a small shape more confusing, restore that section to medium and try a different spot.
Fix three common problems
If every edge is strong, bring the less informative edges back to medium. If a book line appears to run through the cup, erase the hidden section and confirm the join against the real objects. If the cup seems to float, check the position of the base before adding darkness.
Avoid pressing so hard that the graphite cuts into the paper. A slightly softer pencil can produce a stronger mark with a lighter hand. If a taper looks like a blob, practise finishing a few short strokes on the scrap before returning to the drawing.
Review the result in one minute
Put both versions at arm’s length. Can you tell which object is closer, where the cup sits and where your eye lands first? Write one observation under each drawing. A strong mark has earned its place when it makes one of those answers easier.
Change only the location of the emphasis in your next attempt. Then try the same comparison at an overlap in a hair silhouette or a fold of clothing. Export digital versions at the same zoom so that you can compare the marks fairly.
Frequently asked questions
How many weights should a beginner use?
Three are enough for this exercise. Keep most marks medium so the selected light and strong marks have room to work.
Should every near edge be heavy?
Start with edges that clarify an overlap or a point of contact. A quiet foreground edge can work well when it does not compete for attention.
Continue learning with the academy
Choose a course for the skill you want to develop, and check its curriculum and lesson language on the course page.
- Fundamentals of Drawing Faces and Characters — Try the three weights on facial features and overlapping folds of clothing.
- Digital Drawing with Clip Studio Paint — In Clip Studio Paint, draw both versions with one brush and keep them on separate layers.