
What you will learn
- Distinguish an object from its surrounding spaces and enclosed openings.
- Make a small mug study in about twenty minutes with basic materials.
- Review three proportions and carry one specific correction into a second attempt.
What is negative space in drawing?
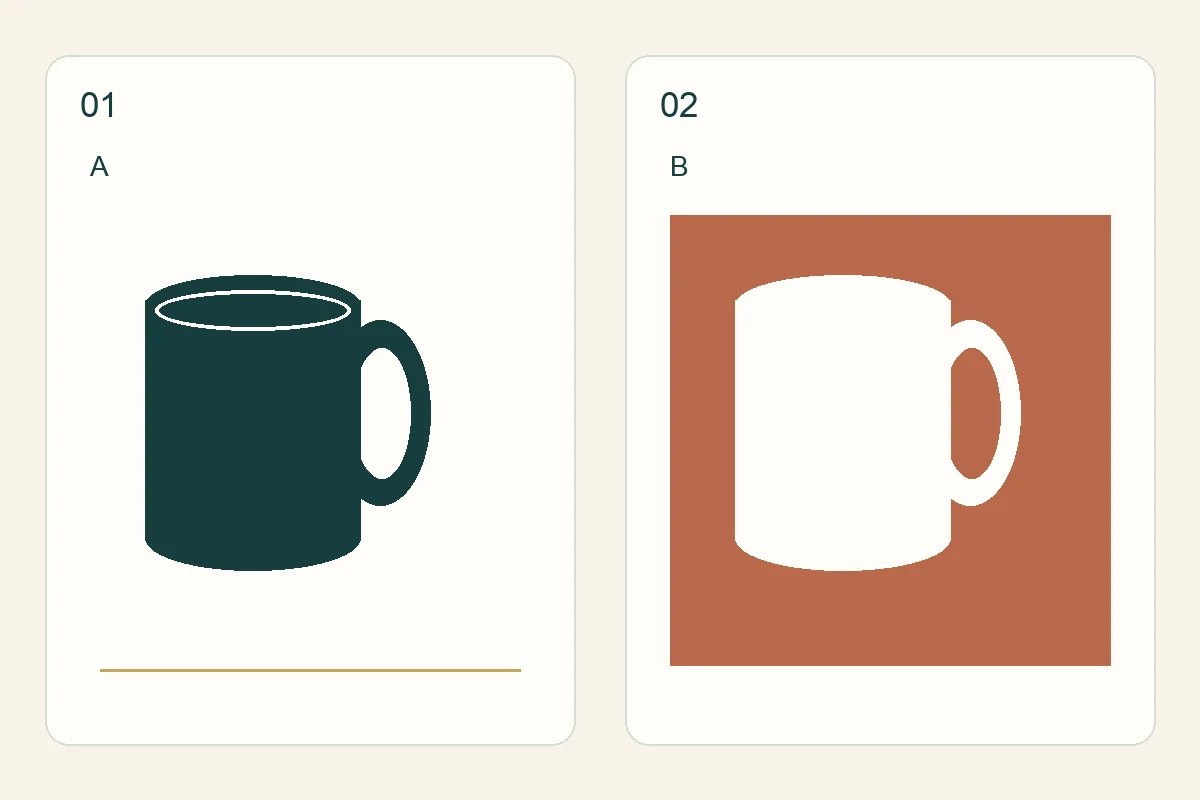
Positive space is the area occupied by the main subject; negative space surrounds it. Getty explains this distinction among the elements of art, and Whitney teaching activities use surrounding shapes to help students observe everyday objects. Negative does not mean unimportant, and this space does not have to be white. Getty: Elements of Art and Space · Whitney Museum: Positive and Negative Space
For this exercise, the mug body is positive space. The opening inside the handle and the gaps between the mug and the picture frame are negative shapes. A shared edge describes both sides. If the opening is too wide, you have a specific relationship to check, even when the handle simply feels wrong.
Materials and a stable setup
Choose an empty mug with a clearly visible handle and put it on a stable surface against a plain background. Sit where you can see the whole opening. Keep your seat, head position and mug in place during the study. Start without transparent material or intricate decoration so you can concentrate on the edges.
Use paper, an HB or 2B pencil and an eraser. Draw a small rectangular frame and leave room for a second study alongside it. A flexible twenty-minute schedule might allow two minutes to observe, eight to construct, five to compare and five to correct. This timing is an editorial practice suggestion, rather than a test of artistic ability.
Observe three spaces before drawing the outline
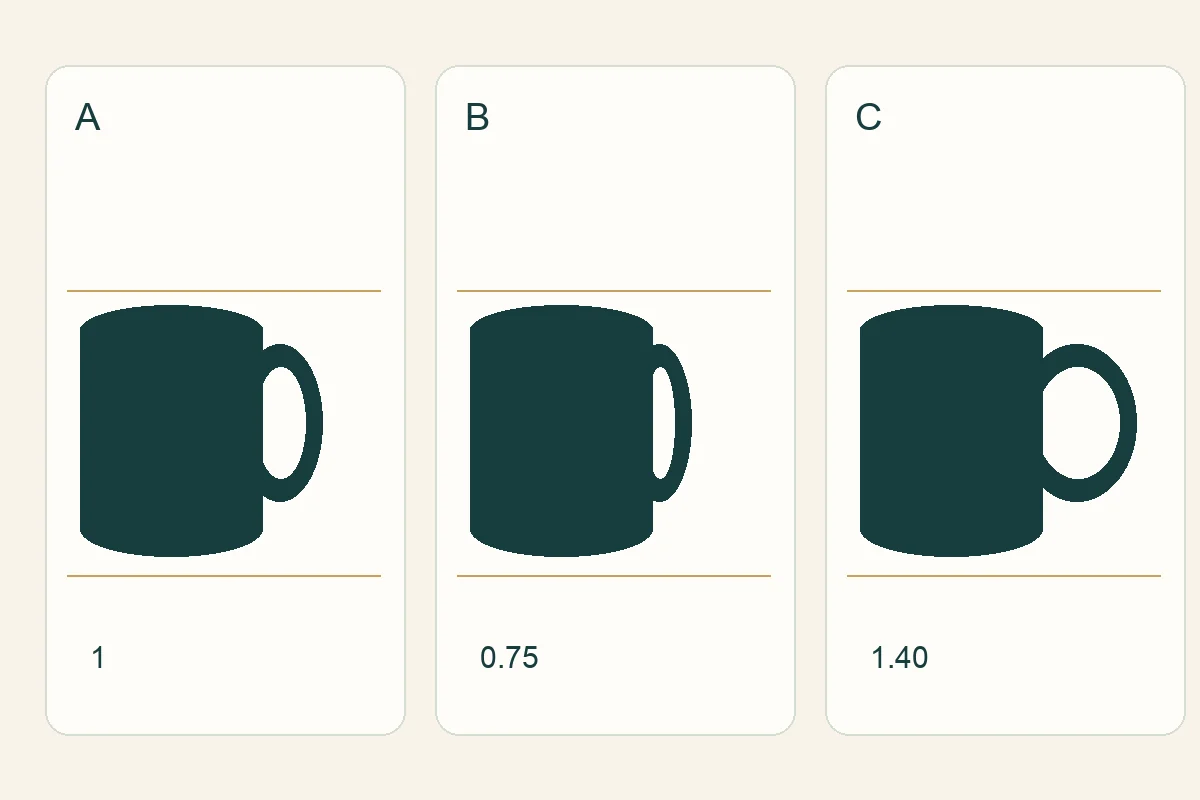
Find the handle opening, the gap above the mug and the gap between the outer handle and the frame. Follow each as though it were an independent paper shape. Is the opening tall and narrow or short and wide? Notice where it reaches its greatest width rather than assuming an even oval.
Use the mug body height as a comparison unit. You can hold a pencil at a consistent arm’s length to estimate relationships without touching or approaching the mug. Exact engineering measurements are unnecessary: compare width with height from one viewing position, then transfer that relationship to the page. Mark the top, bottom and side limits lightly.
Draw the mug through its surrounding shapes
Keep this a line study and leave reflected light and shading for another session. Look back at the mug after each short stroke, asking what shape that stroke creates on either side.
- Place the mug body inside the frame with light reference marks. Compare the upper gap with the side gaps.
- Draw the handle opening first. Mark its highest and lowest points and its furthest point to the side.
- Join those points with short strokes, checking the slope and the opening width halfway down. Do not force it into a regular circle.
- Add the outer handle edge while comparing the thickness around the opening. Observe how it meets the body.
- Complete the body sides and rim, then check the surrounding gaps again before reinforcing any line.
- If useful, shade the negative shapes lightly with one value. You do not need to fill the entire page or turn the study into a finished artwork.
Common errors and focused corrections
Drawing a handle from memory can make it more symmetrical than it appears from your seat. Return to the opening and compare its upper and lower halves. If correcting the handle makes the body too narrow, stop adjusting every edge and return to the original width and height reference marks.
| What you notice | What to compare | One possible correction |
|---|---|---|
| The handle looks oversized | Opening width relative to body height | Move the furthest edge, then compare again. |
| The mug crowds the page edge | Space between handle and frame | Enlarge the next frame instead of squeezing the body. |
| The contour becomes muddy | Repeated corrections on the same edge | Erase one line and redraw it lightly. |
| The spaces change while drawing | Head position and mug placement | Restore the first view or start a new study. |
Review the result and plan a second attempt
Compare the drawing with the setup from a comfortable distance. Check only three relationships: opening width to opening height, the gap above the mug to body height, and the outer side gap to body width. Record each as close, wider or narrower. These simple observations identify the next correction more clearly than a general judgement about whether you can draw.
Choose the largest mismatch and make another small study beside the first, changing that factor alone. Date both attempts and keep them. Later, try the gap between an arm and a torso in your own reference photograph or the opening between two branches. This exercise develops observation; figure construction and shading remain complementary skills.
A desk or chair can also provide useful surrounding spaces, as Whitney’s classroom activities demonstrate. Choose a simple stationary subject and transfer the comparison method to your own observation rather than copying a completed solution. Whitney Museum: Positive and Negative Space
Frequently asked questions
Do I need to fill negative space with black?
No. A light outline or one flat value is enough. The goal is to compare shapes, not to use a particular colour.
Can this help with drawing faces?
You can compare spaces around a head or between body parts in a reference. It complements, rather than replaces, studying facial construction, anatomy and expression.
What if the mug moves?
Restore both the mug and your original viewing position, or start a fresh study. A changed reference cannot provide a fair comparison.
Continue learning with the academy
Choose a course for the skill you want to develop, and check its curriculum and lesson language on the course page.
- Pencil Shading — A possible next step from proportion studies into light and shadow. Check the course page for the actual lesson language.
- Fundamentals of Drawing Faces and Characters — Develop construction of faces, bodies and characters; review the curriculum and available lesson languages before enrolling.